I have updated Format My Source Code for Blogging site to handle 2 space tabs. 2 space tabs are generally used in Ruby programs.
Go Ruby!
Tuesday, June 06, 2006


Wednesday, May 24, 2006
attr_accessor meta programming
Reading Jamis Buck's article Writing Domain Specific Languages I decided to attempt his challenge to write my own attr_accessor function.
First, I was curious to see how attr_accessor was implemented in Ruby. I found the source in object.c which simply calls "rb_attr(klass, rb_to_id(argv[i]), 1, 1, Qtrue);". The "rb_attr" function is located in eval.c. If you spend a few min looking at it, you will see it has special code for handling Access Control (public, private, protected). For now, I will ignore Access Control, and just implement creating the accessor methods.
Where should attr_accessor go? Looking at the docs, you will find attr_accessor is a member of Module. To see if I had the correct location, I quickly wrote...
This failed since Module is not a module, it is a class! Laughing at myself and Ruby, I corrected the definition. The code above also demonstrates how easy you can implement simple Aspect Oriented Programming in Ruby. Using alias, I give the old attr_accessor method an new name old_attr_accessor. Then overwrite attr_accessor with my own code. Any call to attr_accessor will now print out the information that it was called.
Fun so far, but I haven't really defined my own version of attr_accessor. I've simple called the old one. I found module_eval does the trick (class_eval also works since it is a synonym for Module.module_eval). The final code is...
Pretty simple. Unfortunately, this demonstrates the problem where my attr_accessor doesn't know about the Access Control. Looking at the Ruby library and source, I could not find any way to query the Access Control level from within my attr_accessor. So the only solution I could find is the following hack...
Anyone got a better idea for handling Access Control?
First, I was curious to see how attr_accessor was implemented in Ruby. I found the source in object.c which simply calls "rb_attr(klass, rb_to_id(argv[i]), 1, 1, Qtrue);". The "rb_attr" function is located in eval.c. If you spend a few min looking at it, you will see it has special code for handling Access Control (public, private, protected). For now, I will ignore Access Control, and just implement creating the accessor methods.
Where should attr_accessor go? Looking at the docs, you will find attr_accessor is a member of Module. To see if I had the correct location, I quickly wrote...
module Module
  alias old_attr_accessor attr_accessor

  def attr_accessor( *symbols )
    puts "attr_accessor called with #{symbols.join(' ')}."
    old_attr_accessor( *symbols )
  end
end
This failed since Module is not a module, it is a class! Laughing at myself and Ruby, I corrected the definition. The code above also demonstrates how easy you can implement simple Aspect Oriented Programming in Ruby. Using alias, I give the old attr_accessor method an new name old_attr_accessor. Then overwrite attr_accessor with my own code. Any call to attr_accessor will now print out the information that it was called.
Fun so far, but I haven't really defined my own version of attr_accessor. I've simple called the old one. I found module_eval does the trick (class_eval also works since it is a synonym for Module.module_eval). The final code is...
class Module
  def attr_accessor( *symbols )
    symbols.each { | symbol |
      module_eval( "def #{symbol}() @#{symbol}; end" )
      module_eval( "def #{symbol}=(val) @#{symbol} = val; end" )
    }
  end
end

class Foobar
  attr_accessor :foo
  private
    attr_accessor :bar
end

fb = Foobar.new
fb.foo = "hello"
fb.bar = "world"
puts fb.foo  # >> hello
puts fb.bar  # >> world
Pretty simple. Unfortunately, this demonstrates the problem where my attr_accessor doesn't know about the Access Control. Looking at the Ruby library and source, I could not find any way to query the Access Control level from within my attr_accessor. So the only solution I could find is the following hack...
class Module
  alias old_public public
  alias old_private private
  alias old_protected protected

  def public( aSymbol = nil )
    if aSymbol.nil?
      @__module_access_level = 'public'
      old_public
    else
      old_public( aSymbol )
    end
  end

  def private( aSymbol = nil )
    if aSymbol.nil?
      @__module_access_level = 'private'
      old_private
    else
      old_private( aSymbol )
    end
  end

  def protected( aSymbol = nil )
    if aSymbol.nil?
      @__module_access_level = 'protected'
      old_private
    else
      old_private( aSymbol )
    end
  end

  def attr_accessor( *symbols )
    symbols.each { | symbol |
      module_eval( "def #{symbol}() @#{symbol}; end" )
      module_eval( "def #{symbol}=(val) @#{symbol} = val; end" )
      module_eval( "#{@__module_access_level} :#{symbol}; #{@__module_access_level} :#{symbol}=" )
    }
  end

  @__module_access_level = 'public'
end

class Foobar
  attr_accessor :foo
  private
    attr_accessor :bar
end

fb = Foobar.new
fb.foo = "hello"
fb.bar = "world" #>> private method `bar=' called for #<Foobar:0x2855710 @foo="hello"> (NoMethodError)
puts fb.foo  #
puts fb.bar  #
Anyone got a better idea for handling Access Control?
Tuesday, May 16, 2006
Rubyham
It has been over a month since my last post. I have been playing around with Ruby Rails in the little spare time I can find. Sometime I might post more of my experiences with it.
In breaking news, Birmingham is getting a Ruby users group named Rubyham. Kicked off by Josh Adams, Kevin Russell and Myself. It will be fun!
Playing with Rails, I used the Act As Authenticated plugin. The plugin seems to work fine. When adding the User Activation feature, I found a few changes were needed to make me happy. I have posted them back to the User Activation page. Here is the revision with my changes at the bottom.
In breaking news, Birmingham is getting a Ruby users group named Rubyham. Kicked off by Josh Adams, Kevin Russell and Myself. It will be fun!
Playing with Rails, I used the Act As Authenticated plugin. The plugin seems to work fine. When adding the User Activation feature, I found a few changes were needed to make me happy. I have posted them back to the User Activation page. Here is the revision with my changes at the bottom.
Monday, April 03, 2006
SQL on Rails
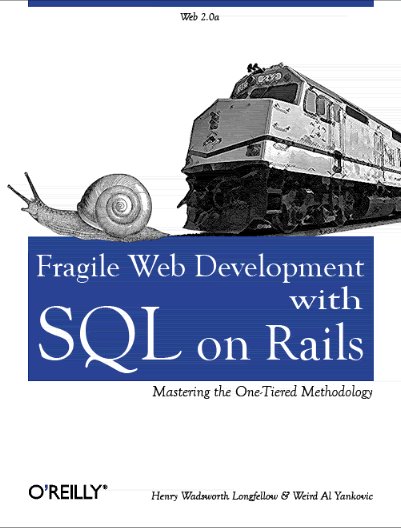
Looks like Rails is taking over the world. Here is the first new langauge fork of Rails that implements all the Rails goodness: SQL on Rails
The a short screen cast is located HERE. Eight minutes that will change your life.
Sunday, March 05, 2006
Using SSL with Ruby http-access2
Expanding on my Ruby scripts, I wanted to download information from my yahoo account. Using Ruby to get HTTP is super easy. For example, the following will print the contents of http://www.w3.org/
Sometime later, I may post some examples of parsing HTML which is also super easy. For now I will talk about getting SSL to work.
Ruby http-access2 is a great library for writting web servers and clients. In this instance I am writting a simple client to login to yahoo and download information like my bookmarks. To login to yahoo, Ruby must use SSL.
It turns out that calling SSL from ruby is pretty easy. Just add the SSL configuration information. [Also, I changed the URL in this example.]
This works great, if you have the correct certificate. If you don't (which happened to me), you get the message:
Figuring out what caused this error was a little confusing because of the "unable to get local issuer certificate" message. It really means "Unable to validate the certificate of the host because the trusted root certificate was not found locally." Unfortunately http-access2's docs are almost non-existent. I eventually found this information from the cURL faq! cURL and http-access2 both use OpenSSL, so the faq about this error is correct. The error message in the stack trace was from OpenSSL.
To solve this error, I had to get the correct root certificate. This is easily accomplished. First, check the web page properties in your browser. For the yahoo page, you will find yahoo is signed by "Equifax Secure Certificate Authority". I'm using Windows XP, so all I had to do was go into Control Panel -> Internet Options -> Content tab -> Certificates -> Trusted Root Certificates -> select "Equifax Secure Certificate Authority" -> Export -> select Base 64 Encoding -> save to file (EquifaxSecureCertificateAuthority.cer). [Firefox did not have an export option.]
Now that the trusted root cert is in a file, Ruby can use it...
Yahoo!!!
require 'http-access2'
client = HTTPAccess2::Client.new()
puts client.get('http://www.w3.org/').content
Sometime later, I may post some examples of parsing HTML which is also super easy. For now I will talk about getting SSL to work.
Ruby http-access2 is a great library for writting web servers and clients. In this instance I am writting a simple client to login to yahoo and download information like my bookmarks. To login to yahoo, Ruby must use SSL.
It turns out that calling SSL from ruby is pretty easy. Just add the SSL configuration information. [Also, I changed the URL in this example.]
require 'http-access2'
client = HTTPAccess2::Client.new()
client.ssl_config.set_trust_ca('ca.cert')
puts client.get('https://login.yahoo.com/config/login?').content
This works great, if you have the correct certificate. If you don't (which happened to me), you get the message:
at depth 0 - 20: unable to get local issuer certificate
http-access2.rb:1001:in `connect': certificate verify failed (OpenSSL::SSL::SSLError)
        from c:/codetiger/ruby/tools/ruby/lib/ruby/site_ruby/1.8/http-access2.rb:1001:in `ssl_connect'
        from c:/codetiger/ruby/tools/ruby/lib/ruby/site_ruby/1.8/http-access2.rb:1363:in `connect'
        ...
Figuring out what caused this error was a little confusing because of the "unable to get local issuer certificate" message. It really means "Unable to validate the certificate of the host because the trusted root certificate was not found locally." Unfortunately http-access2's docs are almost non-existent. I eventually found this information from the cURL faq! cURL and http-access2 both use OpenSSL, so the faq about this error is correct. The error message in the stack trace was from OpenSSL.
To solve this error, I had to get the correct root certificate. This is easily accomplished. First, check the web page properties in your browser. For the yahoo page, you will find yahoo is signed by "Equifax Secure Certificate Authority". I'm using Windows XP, so all I had to do was go into Control Panel -> Internet Options -> Content tab -> Certificates -> Trusted Root Certificates -> select "Equifax Secure Certificate Authority" -> Export -> select Base 64 Encoding -> save to file (EquifaxSecureCertificateAuthority.cer). [Firefox did not have an export option.]
Now that the trusted root cert is in a file, Ruby can use it...
require 'http-access2'
client = HTTPAccess2::Client.new()
client.ssl_config.set_trust_ca('EquifaxSecureCertificateAuthority.cer')
puts client.get('https://login.yahoo.com/config/login?').content
Yahoo!!!
Friday, March 03, 2006
.Net in Ruby
While creating a simple backup script (see previous post), I needed to copy more than the file's data. The backup copy needed to include the meta-data that Windows keeps for the file. Ruby (and Java or Ant) can easily copy the contents of a file, but they don't know how to copy the meta-data. The solution is to use .Net, but I wanted to write my script in Ruby.
I found the Ruby/.Net Bridge worked like magic. For example to copy a file, just use...
The install of Ruby/.Net Bridge was very simple. Just download, unzip, and run deploy.cmd. The ease of installation made me very happy.
After I created my backup script. I wondered if this Bridge worked with .Net v2.0. So I took a spare machine and removed .Net v1.1 to make sure the Bridge could only use v2.0. Everything worked perfect!
The one area that I had trouble was handling .Net's Enum. In .Net, the FileAttributes class is an Enum which is also a bit field (see FlagsAttribute). Using the Ruby/.Net Bridge, I could not perform bit-wise math operations on the Enum. I asked the authors, who gave me a good solution using the Parse method. For example:
The last feature that I wanted, was to decrypt files and folders that were stored in encrypted file systems. Since Windows encryption used a key tied to the machine and user, the backup should not stay encrypted. If the machine failed it may be impossible to get the necessary key to decrypt. Unfortunately there wasn't a .Net method to decrypt the file or folder. Instead I had to call the win32api. This was pretty easy to do (however, I found the available documentation very lacking.) The following is a combination of some Utility methods, and the DecryptFile method I created for my script.
An example usage...
I found the Ruby/.Net Bridge worked like magic. For example to copy a file, just use...
require 'dotnet' # Ruby / .Net bridge
System.IO.File.Copy( srcpath, destpath )
The install of Ruby/.Net Bridge was very simple. Just download, unzip, and run deploy.cmd. The ease of installation made me very happy.
After I created my backup script. I wondered if this Bridge worked with .Net v2.0. So I took a spare machine and removed .Net v1.1 to make sure the Bridge could only use v2.0. Everything worked perfect!
The one area that I had trouble was handling .Net's Enum. In .Net, the FileAttributes class is an Enum which is also a bit field (see FlagsAttribute). Using the Ruby/.Net Bridge, I could not perform bit-wise math operations on the Enum. I asked the authors, who gave me a good solution using the Parse method. For example:
require 'dotnet' # Ruby / .Net bridge

def attributeRemove( fileattribute, attribute )
    Enum.parse( System.IO.FileAttributes, (fileattribute.ToString().split(', ') - [attribute]).join( ', ' ) )
end

def setReadWrite( dospath )
    attrs = attributeRemove( System.IO.File.GetAttributes( dospath ), 'ReadOnly' )
    System.IO.File.SetAttributes( dospath, attrs )
end
The last feature that I wanted, was to decrypt files and folders that were stored in encrypted file systems. Since Windows encryption used a key tied to the machine and user, the backup should not stay encrypted. If the machine failed it may be impossible to get the necessary key to decrypt. Unfortunately there wasn't a .Net method to decrypt the file or folder. Instead I had to call the win32api. This was pretty easy to do (however, I found the available documentation very lacking.) The following is a combination of some Utility methods, and the DecryptFile method I created for my script.
require 'Win32API'
require 'dotnet' # Ruby / .Net bridge http://www.saltypickle.com/rubydotnet/ just download it, uncompress and run deploy.cmd (per instructions on site)

class Utils
    def Utils.attribute?( dospath, attribute )
        if attribute.is_a?(String)
            return System.IO.File.GetAttributes( dospath ).ToString().split(', ').include?( attribute )
        else
            raise "attribute parameter must be a String.  attribute.class=#{attribute.class}"
        end
    end

    def Utils.attributeAdd( fileattribute, attribute )
        Enum.parse( System.IO.FileAttributes, fileattribute.ToString() + ', ' + attribute )
    end

    def Utils.attributeRemove( fileattribute, attribute )
        Enum.parse( System.IO.FileAttributes, (fileattribute.ToString().split(', ') - [attribute]).join( ', ' ) )
    end

    def Utils.setReadWrite( dospath )
        attrs = Utils.attributeRemove( System.IO.File.GetAttributes( dospath ), 'ReadOnly' )
        System.IO.File.SetAttributes( dospath, attrs )
    end

    def Utils.setReadOnly( dospath )
        attrs = Utils.attributeAdd( System.IO.File.GetAttributes( dospath ), 'ReadOnly' )
        System.IO.File.SetAttributes( dospath, attrs )
    end
end

class Win32API
    def Win32API.DecryptFile( dospath )
        Utils.setReadWrite( dospath ) if  isReadOnly = Utils.attribute?( dospath, 'ReadOnly' )
        result = Win32API.new('Advapi32', 'DecryptFile', %w(p i), 'i').call(dospath,0)
        #todo better error checking
        if result == 0
            Utils.setReadOnly( dospath ) if isReadOnly
            raise "DecryptFile call failed on path: \"#{dospath}\".  see also: http://msdn.microsoft.com/library/default.asp?url=/library/en-us/fileio/fs/decryptfile.asp"
        end
        Utils.setReadOnly( dospath ) if isReadOnly
        return result
    end
end
An example usage...
if Utils.attribute?( path, 'Encrypted' )
    Win32API.DecryptFile( path )
end
Monday, February 20, 2006
About: Format My Source Code
Several times I have wanted to post code to my blog. Only to find the process frustrating. To put the code on a blog you have to convert the source text into HTML. This also involves converting tabs to spaces; converting special characters to HTML encoding; setting a nice fixed-width font; and fixing a couple of other minor issues.
After searching around, I found a web page that would format C# and other Microsoft languages at C# code format. Which was great for C#, but I wanted to post Ruby, Java and other languages. My answer was to code my own source code to HTML converter. After hacking a little java-script, I have created:
Format My Source Code
The application is just a little bit of Java Script and DHTML to perform the conversion. I decided to publish it on blogspot since it was a tool for blogging. Getting everything to fit in the confines of a Blog page was a little limiting. I might change the layout when I've got more time.
The application has a few interesting features. When you press the "Format" button, I have the output section perform a yellow fade which was invented by Matthew Linderman at 37 Signals. I modified their technique a little to adjust the timing.
One problem I encountered was Blogger's editor. The "Compose" option would eat vertical pipe characters: |. Since my favorite language Ruby uses this character a lot, I tried hard to find a way to fix it. But "Compose" would always remove the characters. Fortunately, the "Edit HTML" option leaves the | character alone. So I added the detection of this character and a small warning will display.
To increase the usability, I added some code to automatically select the first input when the page loads. So a simple ctrl-v will paste into the input field without requiring any additional typing or mousing. Likewise, the generated HTML is automatically selected so all you need is to hit ctrl-c to copy to the clipboard.
I have the example output clipped to 25 lines. Also, if Embed Stylesheet is not used, an example style sheet will appear.
Enjoy!
If you are curious, here is the source code (at the time it was first posted):
After searching around, I found a web page that would format C# and other Microsoft languages at C# code format. Which was great for C#, but I wanted to post Ruby, Java and other languages. My answer was to code my own source code to HTML converter. After hacking a little java-script, I have created:
Format My Source Code
The application is just a little bit of Java Script and DHTML to perform the conversion. I decided to publish it on blogspot since it was a tool for blogging. Getting everything to fit in the confines of a Blog page was a little limiting. I might change the layout when I've got more time.
The application has a few interesting features. When you press the "Format" button, I have the output section perform a yellow fade which was invented by Matthew Linderman at 37 Signals. I modified their technique a little to adjust the timing.
One problem I encountered was Blogger's editor. The "Compose" option would eat vertical pipe characters: |. Since my favorite language Ruby uses this character a lot, I tried hard to find a way to fix it. But "Compose" would always remove the characters. Fortunately, the "Edit HTML" option leaves the | character alone. So I added the detection of this character and a small warning will display.
To increase the usability, I added some code to automatically select the first input when the page loads. So a simple ctrl-v will paste into the input field without requiring any additional typing or mousing. Likewise, the generated HTML is automatically selected so all you need is to hit ctrl-c to copy to the clipboard.
I have the example output clipped to 25 lines. Also, if Embed Stylesheet is not used, an example style sheet will appear.
Enjoy!
If you are curious, here is the source code (at the time it was first posted):
<head>
<!-- THIS STUFF GOES IN THE HEADER TEMPLATE -->
<style type="text/css">
pre.source-code {
font-family: Andale Mono, Lucida Console, Monaco, fixed, monospace;
color: #000000;
background-color: #eee;
font-size: 12px;
border: 1px dashed #999999;
line-height: 14px;
padding: 5px;
overflow: auto;
width: 100%
}
p.warning {
color: #000000;
background-color: #FFB6C1;
font-size: 12px;
border: 3px double #333333;
line-height: 14px;
padding: 5px;
overflow: auto;
width: 100%
}
</style>
<SCRIPT LANGUAGE="JavaScript">
<!--
var Color= new Array();
Color[1] = "ff";
Color[2] = "ee";
Color[3] = "dd";
Color[4] = "cc";
Color[5] = "bb";
Color[6] = "aa";
Color[7] = "99";
function fadeIn(where) {
if (where >= 1) {
document.getElementById('fade').style.backgroundColor = "#ffff" + Color[where];
if (where > 1) {
where -= 1;
setTimeout("fadeIn("+where+")", 200);
} else {
where -= 1;
setTimeout("fadeIn("+where+")", 200);
document.getElementById('fade').style.backgroundColor = "transparent";
}
}
}
function format() {
var strIn = document.getElementById("textin").value;
var strOut = null;
if ( document.getElementById("embedstyle").checked ) {
strOut = "<pre style=\"font-family: Andale Mono, Lucida Console, Monaco, fixed, monospace; color: #000000; background-color: #eee;font-size: 12px;border: 1px dashed #999999;line-height: 14px;padding: 5px; overflow: auto; width: 100%\"><code>";
hideElement("style");
} else {
strOut = "<pre class=\"source-code\"><code>";
showElement("style");
}
var strOut25 = null;
var line = 1;
var strTab;
var hasVerticalPipe = false;
if ( document.getElementById("tab4").checked ) {
strTab = " ";
} else {
strTab = " ";
}
for ( i = 0; i < strIn.length; i++ ) {
var code = strIn.charCodeAt(i);
switch( code ) {
case 9: // tab
strOut += strTab;
break;
case 10: // line-feed
case 13:
strOut += "\n";
line += 1;
if ( line == 26 ) {
strOut25 = strOut + "[only the first 25 lines shown in this example]\n\n";
}
if ( code == 13 && (i + 1) < strIn.length && strIn.charCodeAt(i + 1) == 10 ) {
i++;
}
break;
case 34:
strOut += """;
break;
case 38:
strOut += "&";
break;
case 60:
strOut += "<";
break;
case 62:
strOut += ">";
break;
case 124: // vertical pipe (blogger modifies this)
strOut += "|";
hasVerticalPipe = true;
break;
default:
if ( code >= 32 && code <= 127 ) {
strOut += strIn.charAt(i);
} else {
strOut += "&#" + code + ";";
}
break;
} // switch
} // for
strOut += "\n</code></pre>";
var textoutelement = document.getElementById("textout")
textoutelement.value = strOut;
textoutelement.focus();
textoutelement.select();
if ( hasVerticalPipe ) {
showElement( "vert-pipe-warning" );
} else {
hideElement( "vert-pipe-warning" );
}
var resultselement = document.getElementById("results");
if ( strOut25 != null ) {
resultselement.innerHTML = strOut25;
} else {
resultselement.innerHTML = strOut;
}
fadeIn(7);
}
function onloadEvent() {
var textinelement = document.getElementById("textin");
textinelement.focus();
textinelement.select();
}
function showElement(strId) {
var ref = document.getElementById(strId);
if ( ref.style) { ref = ref.style; }
ref.display = '';
}
function hideElement(strId) {
var ref = document.getElementById(strId);
if ( ref.style) { ref = ref.style; }
ref.display = 'none';
}
//-->
</SCRIPT>
<!-- END STUFF GOES IN THE HEADER TEMPLATE -->
</head>
<!-- THE BODY ELEMENT NEEDS THE ONLOAD EVENT -->
<body onLoad="javascript:onloadEvent()">
<!-- THIS STUFF GOES IN POST -->
<form>
<p>
<textarea wrap="off" rows="5" cols="50" id="textin">Paste your text here.</textarea><br/>
<table>
<tr>
<td><button onclick="format()" type="button">Format Text</button></td>
<td>
Tab size: <input type="radio" name="tabsize" id="tab4" checked="true">4</input> <input type="radio" name="tabsize" id="tab8">8</input><br/>
Embed Stylesheet: <input type="checkbox" id="embedstyle" checked="true"></input><br/>
</td>
</tr>
</table>
</p>
<p>
<div class="step-instr" id="fade">Copy the HTML below to your clipboard. Insert the HTML of your blog or wiki.<br/>
<textarea wrap="off" rows="12" cols="50" id="textout">formatted HTML will appear in here.</textarea></div>
</form>
</p>
<div id="vert-pipe-warning" style="display: none">
<p class="warning">
<b>Vertival Pipe Character Warning:</b><br/>
The text contains the vertical pipe character '|' which Blogger's editor may remove. Blogger's editor on the web has two edit tabs: "Edit HTML" and "Compose". The "Compose" tab will remove all | characters! Use the "Edit HTML" tab only.
</p>
</div>
<div id="results"><pre class="source-code"><code>This is an example of what your text will look like.
• Tabs are converted to spaces.
• Quotes and other special characters are converted to HTML.
• Everything is enclose in HTML's 'pre' and 'code' tags.
• Style is set:
• Fixed width font.
• Shaded box.
• Dotted line border.
</code></pre>
</div>
<p>
<div id="style" style="display: none">
Example Stylesheet:<br/>
<textarea wrap="off" rows="13" cols="50" id="textout"><style type="text/css">
pre.source-code {
font-family: Andale Mono, Lucida Console, Monaco, fixed, monospace;
color: #000000;
background-color: #eee;
font-size: 12px;
border: 1px dashed #999999;
line-height: 14px;
padding: 5px;
overflow: auto;
width: 100%
}
</style></textarea>
</div>
</p>
<!-- END STUFF IN POST -->
</body>
Subscribe to:
Posts (Atom)